Make It Up As You Grow Along
There's a lot of room for modding in this project, but there are two main versions, Organised Chaos (scrap busting) and Boardwalk (stash busting or planned design). The concept can easily translate over to crochet, in your preferred basic stitch.
Organised Chaos
Yarn: designed in DK but chuck in 10ply and 12ply, and double stranded 4ply
Needles: 4.5/5/5.5 - depends on how squishy you want it
Cables: you'll need two on the longer side, or one main cable and scrap yarn
Skills needed: casting on, garter stitch, picking up stitches
You'll want around 800g - 1kg of yarn. Collect all your nuggets and leftovers, and any random skeins that have been sitting around for too long. You'll want to use up the smallest ones first.
Cast on 15 stitches using your favourite stretchy cast on method.
Start using up your nuggets! If you don't like losing at yarn chicken (if you're aiming for clean garter stitch rows) then so long as you have three lengths of your live stitches, you should be good to go.
Section One of the sample has 36 rows (18 ridges). But if your nugget near there runs out or has more to go, just roll with it. When you decide the end of this section, leave the stitches active on the cable or transfer onto scrap yarn.
Section Two. If you have 36 rows, you'll want to pick up 19 stitches along one side of your rectangle. This includes a stitch from your cast on row. The last stitch is a bit awkward as it is connected to your live stitches. I tend to knit into the back of the picked up stitched for the first row, and then resume regular garter stitch.
Sections Three and Onwards. This will depend on how much length you add to the section you've just knit. You pick up a stitch for each ridge (return row). Knit until you've effectively doubled the size of what you had. e.g Section Two is the same size as Section One. Section Three is (roughly) the same size of Section One + Section Two. Section Four will be the same size as Section One+Two+Three and so on.
Keep going until you're happy with the size, or you use up your yarn.
Boardwalk
Yarn: DK, approx 10 x 100g (two need to be the same colour to be the MC and border)
Needles: I used 5mm, but 4 or 4.5 will be fine
In my experiment I had 4 x 100g (and extra of the charcoal available) 1 x 70g and 1 x 75g. I later added 3more border colours - I had 100g of each)
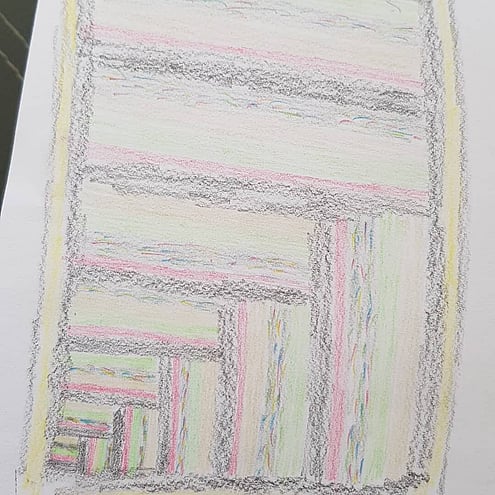
I started knitting based off the concept drawing and wrote up what I did as I went.
| MC: Charcoal CC1: Pink CC2: Beige CC3: Green CC4: Party | CC5: Yellow CC6: Orange CC7: Grey Sparkle CC8: Teal (because teal always takes it home) |
On a pick up row, I tend to knit into the back of the stitch. But if you have your own preferred method, please use that!
Boardwalk - Section Two
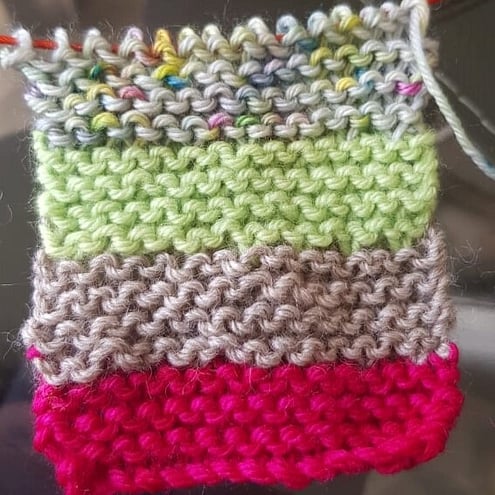
Leave your stitches live at the end of section one, or transfer to scrap yarn if you don't have a spare cable. If following this design, pick up 16 stitches along one side of your section. Then:
- MC Knit 8 rows
- CC1 Knit 6 rows
- CC2 Knit 8 rows
- CC3 Knit 8 rows
- CC4 Knit 8 rows
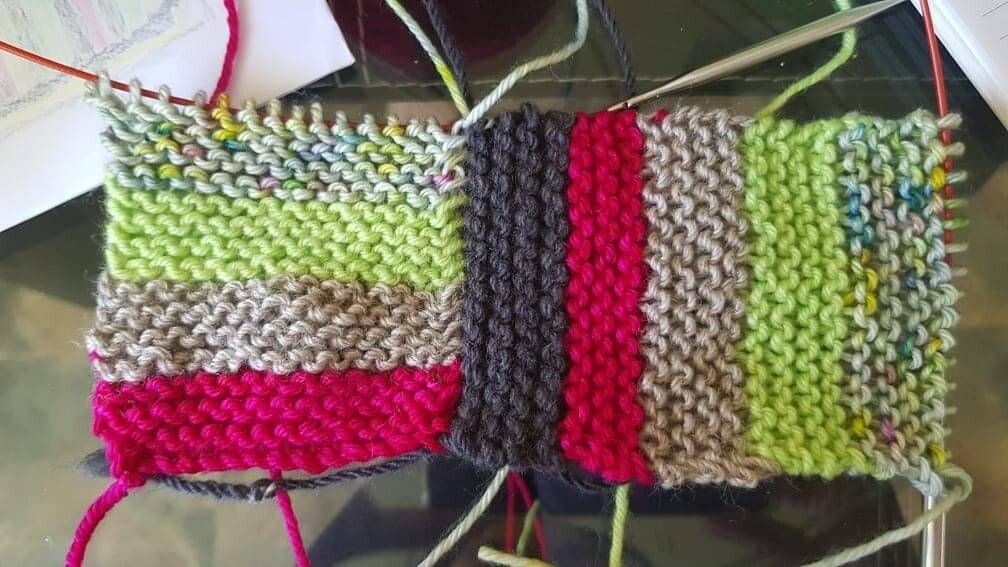
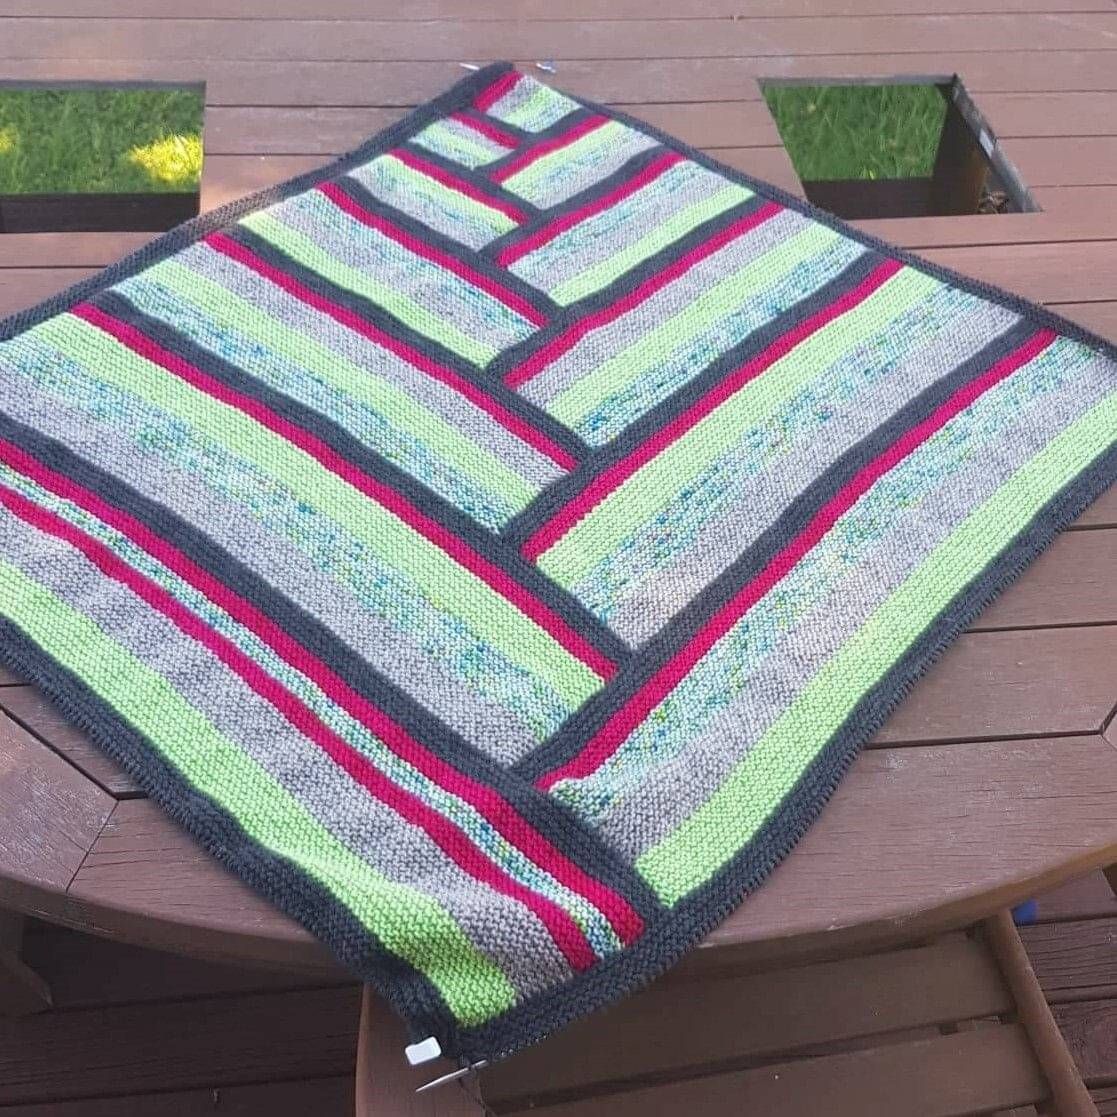
Boardwalk - Section Five & Six
Section Five: Pick up 22 stitches.
- MC Knit 8 rows
- CC1 Knit 6 rows
- CC4 Knit 10 rows
- CC2 Knit 10 rows
- CC3 Knit 10 rows
Section Six: Repeat Section Five
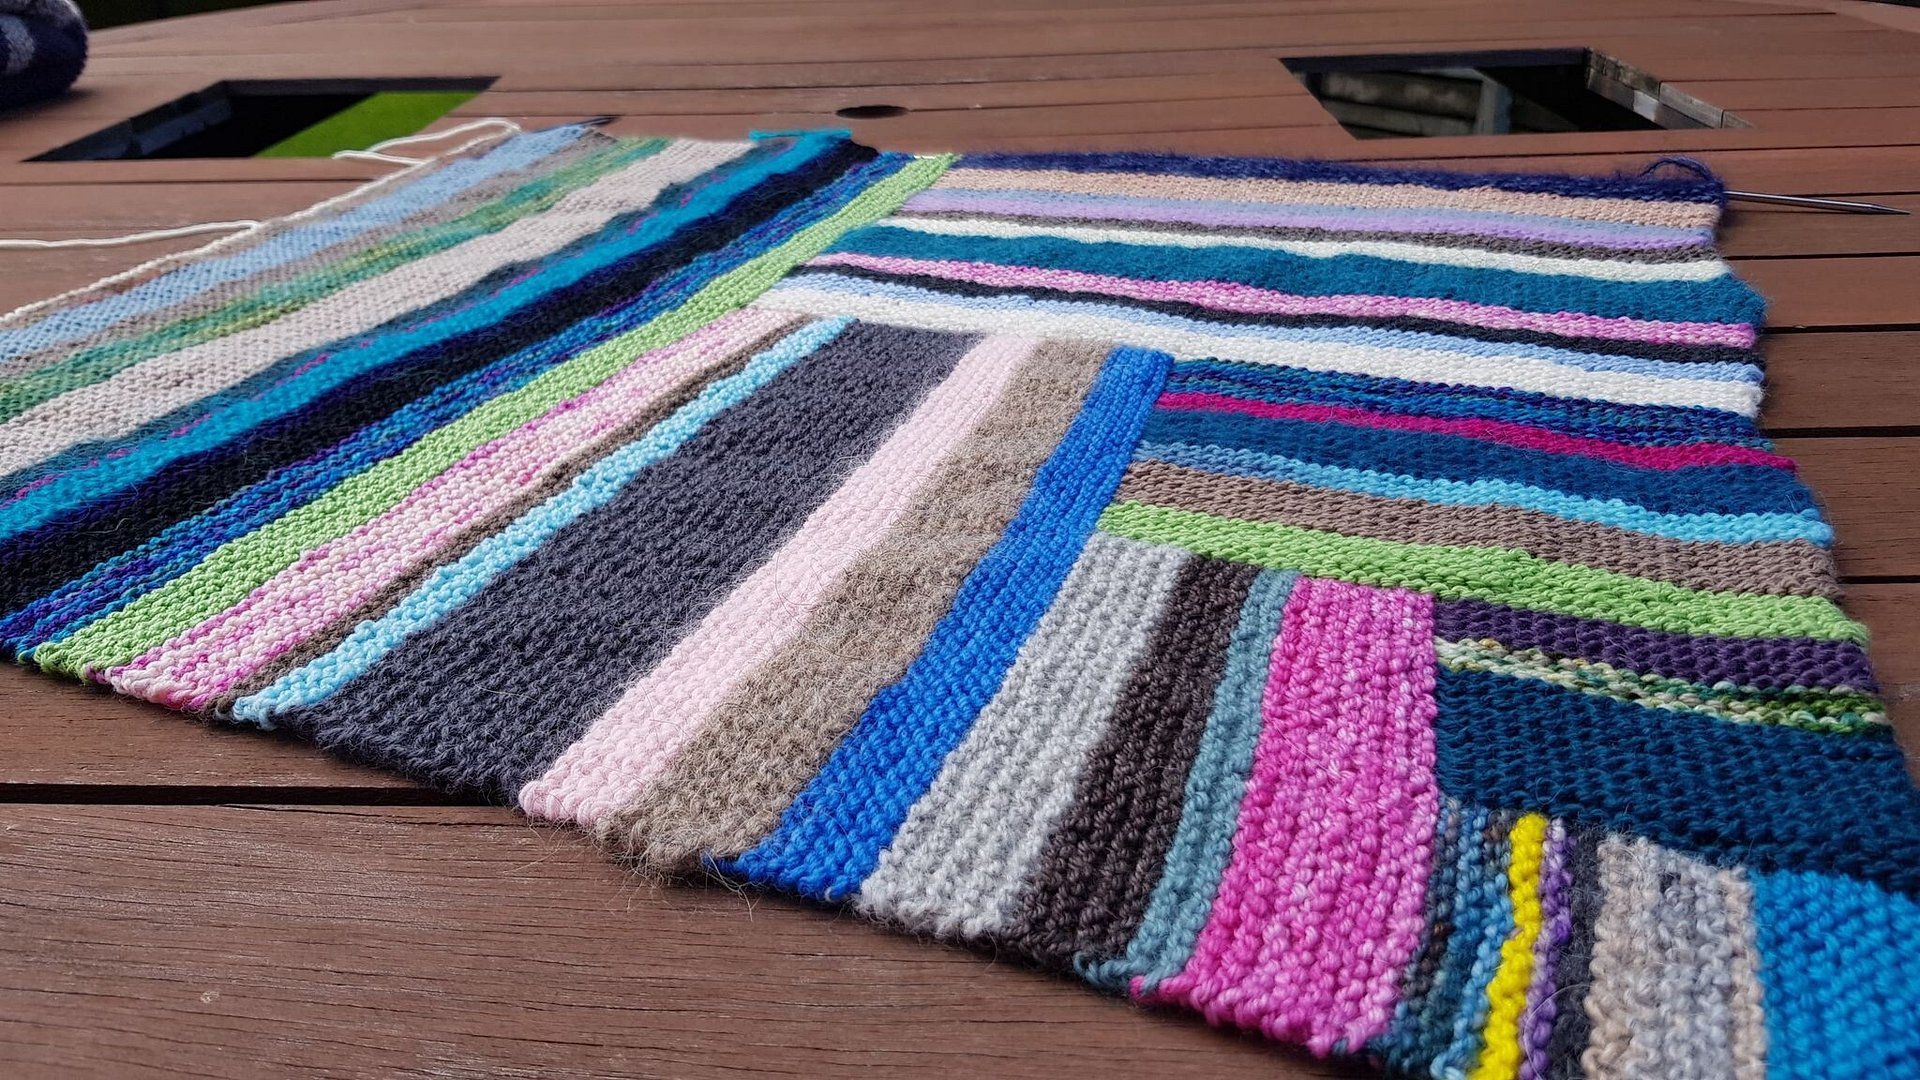
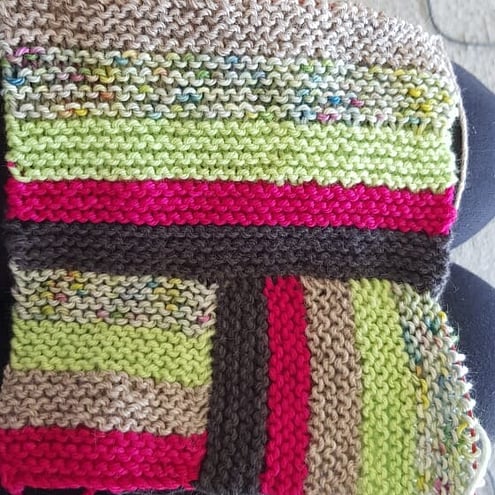
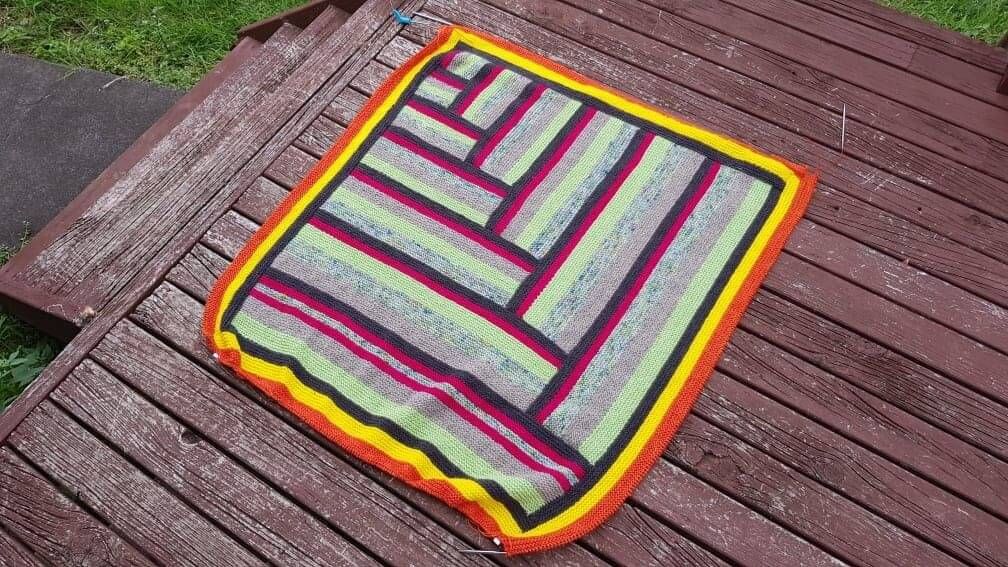
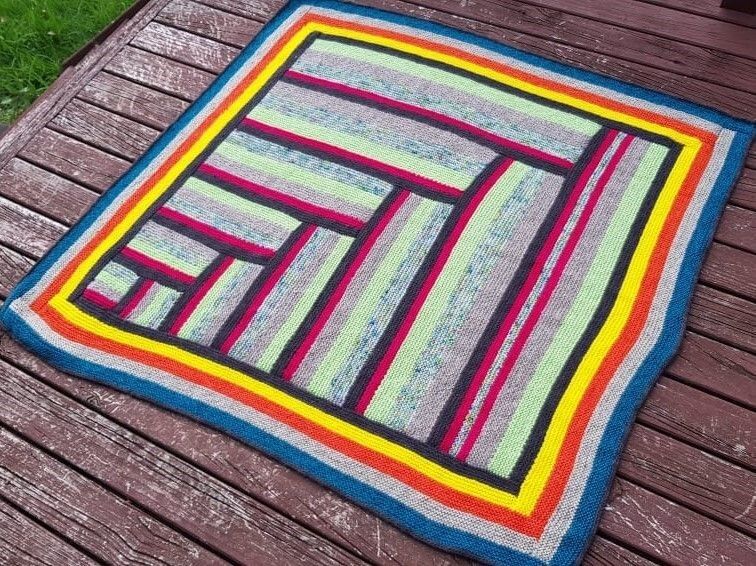
In case you haven't noticed, I've been shuffling three of the contrast colours to keep things interesting, but ultimately, you can do what you like. Now that six sections are complete, you can see how the charcoal is framing my colours and the pink adds a fun pop. You basically keep going until you run out of yarn. My original design was going to finish with a charcoal border after the yellow, except when I got to it, I realised that it looked like a bumblebee, and while bumblebees are cute, that wasn't the effect I wanted for my blanket. So I added the orange. Which then felt unbalanced, so I added the grey, which felt better, but that's when I realised it really did need teal. Which of course I have in stash because it's my go-to colour.
Adding the Borders
Okay, this is where things can deviate if you don't want to do it the way I did. At this point I could have cast off and then added the borders like you do with a ten stitch blanket with mitred corners. I didn't feel like learning how to do a mitred corner so I opted to have four live edges (and bought more cables because I didn't want to transfer to scrap yarn). So as you work each side of the border, you'll also still be picking up a few stitches as you work each side.
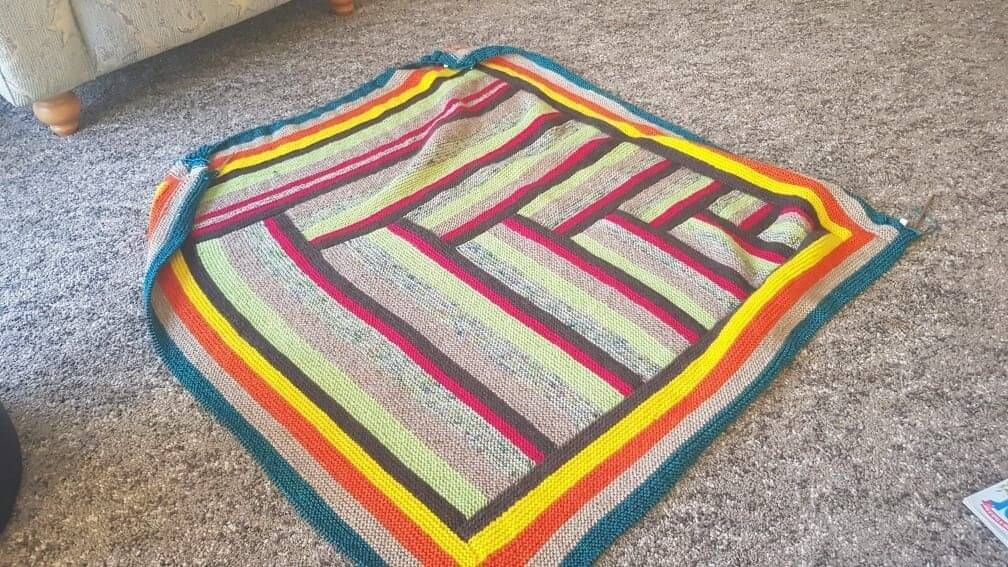
Are you up for an icord bind off?
Because my live edges are in teal, I needed to do one row in the charcoal (or the colour you are using as your MC) and then do the icord bind off on the return row. This gives you a clean icord edging in your MC. However, doing it this way meant that I had to fudge my corners together.
So if you are working off all live edges, and have enough connectors to create a giant cable, then I would put all edges onto the one cable. If you do this, when you get to the corners, you need to do a kfb for the two stitches on each side of the corner. This will mean your icord will curve nicely as you bind off, though it may feel a bit awkward as you knit the row of that corner. You stay on the right side of your work to do this.
However, if you'd rather cast off and work the icord on the finished blanket, you need to work from the wrong side. And I found this tutorial that shows you how to do it.